Create MS SQL Server or MS SQL Express 32 bit instance
Act! instance of SQL may be used with caution.
Specify SQL Server administrators
If in Domain environment we recommend adding Domain Administrators
Authentication Mode
Mixed Mode
Make SA enabled
Create sa password and keep for your records
Compatible MS SQL Versions
SQL 2016
SQL 2014
SQL 2012
SQL 2008
SQL Server Management Studio (SSMS)
SQL Security - User Logins
Windows Login Options (use either type)
Type: Windows User
Type: Windows Group
64 Bit Operating Systems
Create MS SQL Server or MS SQL Express 64 bit instance
Act! instance of SQL may be used with caution.
Specify SQL Server administrators
If in Domain environment we recommend adding Domain Administrators
Authentication Mode
Mixed Mode
Make SA enabled
Create sa password and keep for your records
Compatible MS SQL Versions
SQL 2016
SQL 2014
SQL 2012
SQL 2008
SQL Server Management Studio (SSMS)
SQL Security - User Logins
Windows Login Options (use either type)
Type: Windows User
Type: Windows Group
QuickBooks application uses 32 bit ODBC provider, therefore DataPlus will install a 64 bit driver.
QuickBooks
Version: QuickBooks 2013 or higher
QuickBooks installed (Pro, Premium or Enterprise) Note: DataPlus for QuickBooks 4.0 and it's SQL instance must be installed where QuickBooks application is installed.
Company file location. Path and company file name.
To find location from within QuickBooks tap the F2 key (or use CTRL + 1). A screen will pop up that shows information about your QuickBooks data file, and among that will be a box that shows the location of your file.
Act! Premium
Version: Act Premium v16 or higher
Act Premium installed
What you need for installation?
DataPlus for QuickBooks installer (DataPlus-QB-Install.exe)
Act! database for QuickBooks
Hogan Data provides a Act! database with the purchase of DataPlus for QuickBooks Application
Or you can use your existing database
There will be new fields created & will have to be added to layout
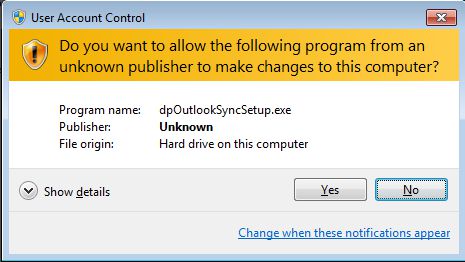
Right click 'DataPlus-QB-Install.exe' and choose "Run as administrator"
Depending on your network configuration the "User Account Control" dialog box may load.
Click on Yes
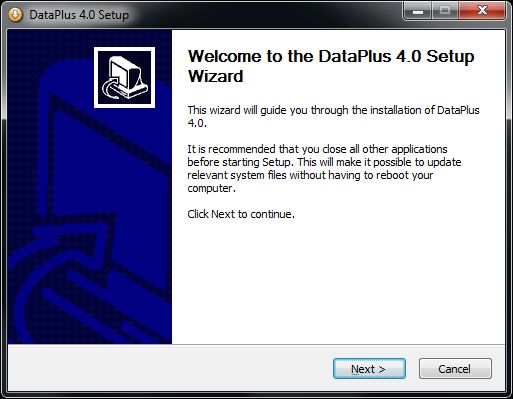
DataPlus SetupWelcome Screen
Click on Next >
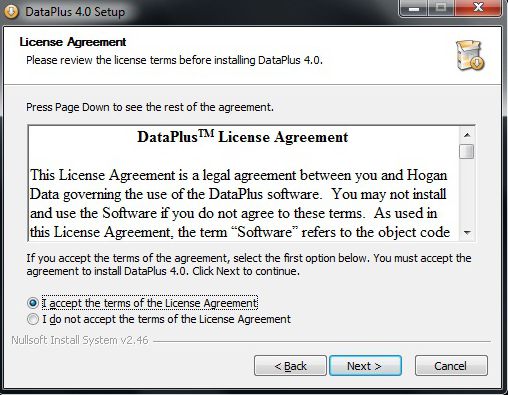
DataPlus SetupLicense Agreement
License Agreement
If you agree, check "I accept the terms in the license agreement"
Click on Next >
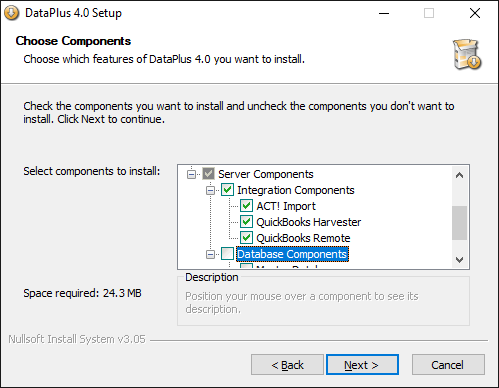
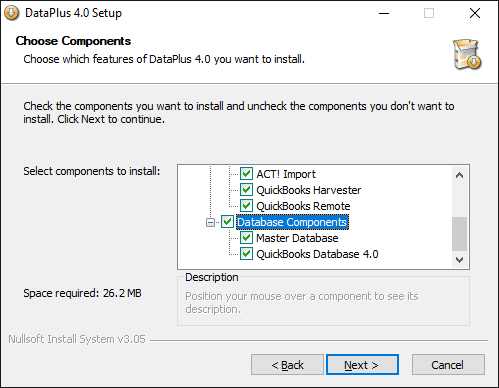
DataPlus SetupServer Components
If you are going to install just the server component, check "Server Components"
Check "Database Components"
Note: The following will create a DataPlus SQL database in SQL instance
Click on Next >
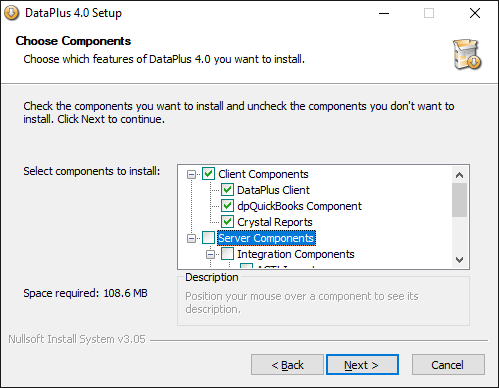
DataPlus SetupServer/Client Components
If you are going to install server and client components, check "Client Components", check "Server Components" and check "Database Components"
Note: The following will create a DataPlus SQL database in SQL instance
Click on Next >
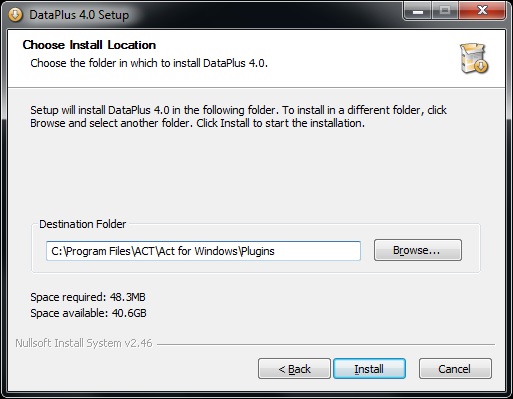
DataPlus SetupChoose Install Location
Choose the folder in which to install DataPlus
Note: Act integration requires using the Act Plugins folder. We recommend leaving the default path.
Click on Install
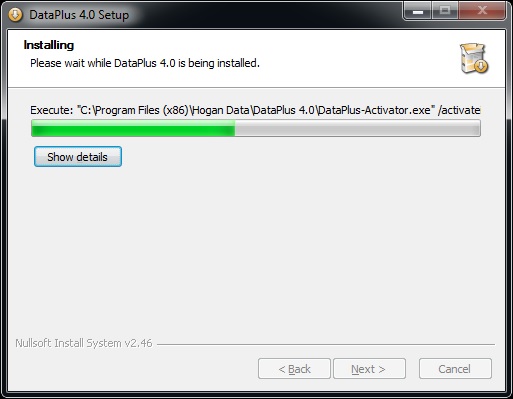
DataPlus SetupInstalling
DataPlus SetupServer Credentials Server Settings
SQL Server Name: Server\SQLInstanceName
Database Name: dpQuickBooks
Credential SettingsWindows Authentication
User: sa or other user you setup
Password: password
Integrated Security
Check Integrated Security
Click on Next >
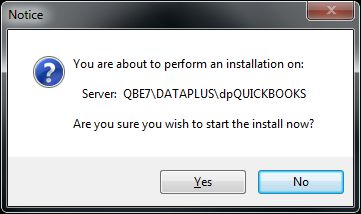
DataPlus Database SetupPerform Installation
Click on Yes
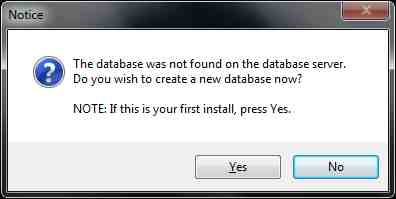
DataPlus Database SetupCreate Database
Click on Yes
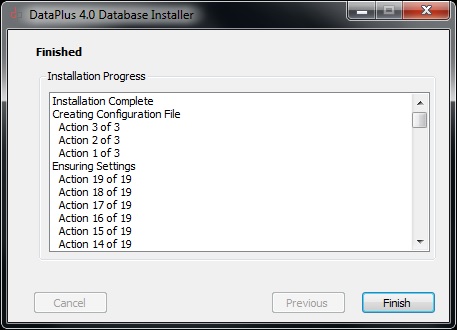
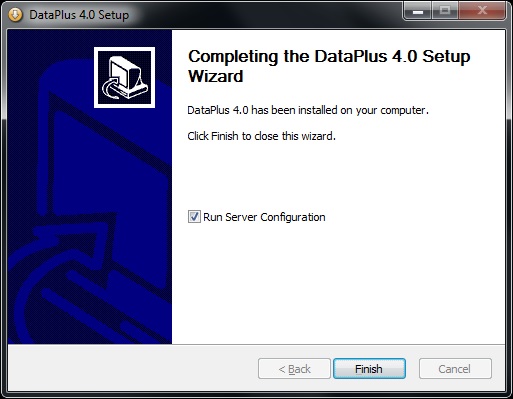
DataPlus Database SetupFinished
Installation Complete
Click on Finish
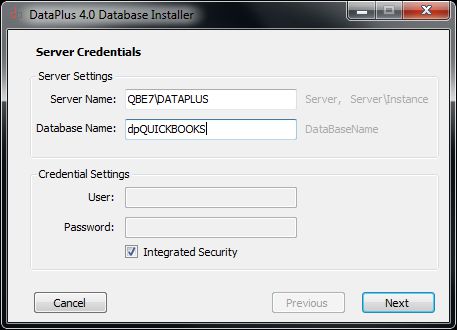
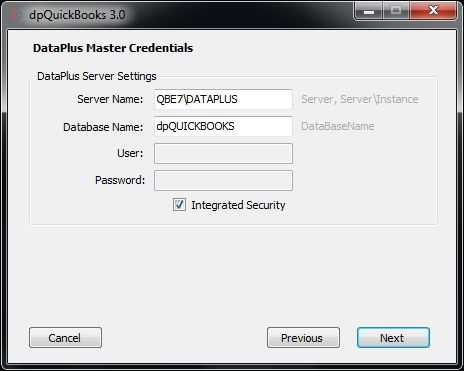
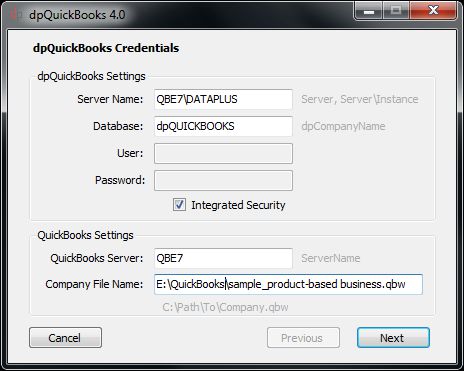
QuickBooks SetupMaster Credentials Server Settings
SQL Server Name: Server\SQLInstanceName
Database Name: dpQuickBooks
Note: This is the database name you originally created. Installer will add additional components. Choose Integrated Security or uncheck for SQL credentials
Note: This is the database name you originally created. Installer will add additional components. Choose Integrated Security or uncheck for SQL credentials
Note: To find location from within QuickBooks tap the F2 key (or use CTRL + 1). A screen will pop up that shows information about your QuickBooks data file, and among that will be a box that shows the path and company file name.
Credential Settings Windows Authentication
User: sa or other user you setup
Password: password
Integrated Security
Check for Integrated Security
QuickBooks Settings
QuickBooks Server: ServerName
Company File Name: E:\QuickBooks\sample_product-based business.qbw
Note: This is the path and file name for your QuickBooks company.
Click on Next >
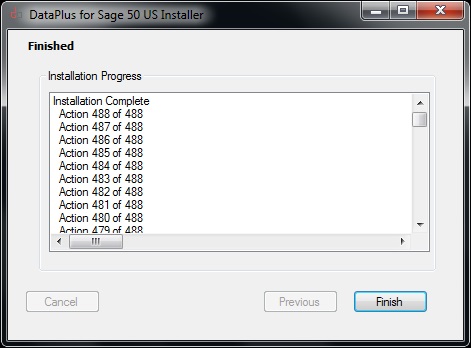
DataPlus SetupInstallation Progress
Click Finish
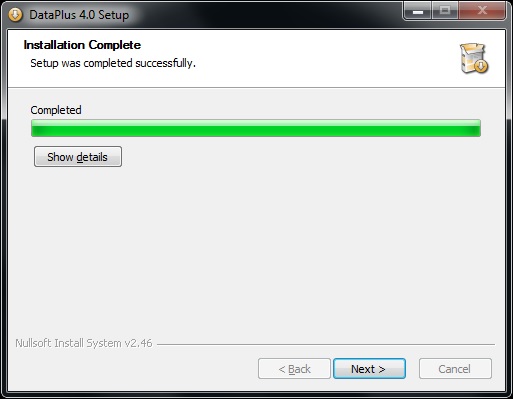
DataPlus SetupInstallation Complete
Click Next >
DataPlus SetupServer Configuration
Check Run Server Configuration
Note: If you chose Server & Client components, then both configurations will be available
Database; ActDatabaseName click on [...] to browse to database
User Name: ActUserName must be an Act! administrator
Password: ActPassword
Confirm: ActPassword
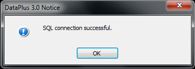
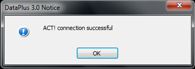
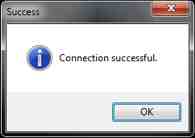
Test Connection
Click on OK
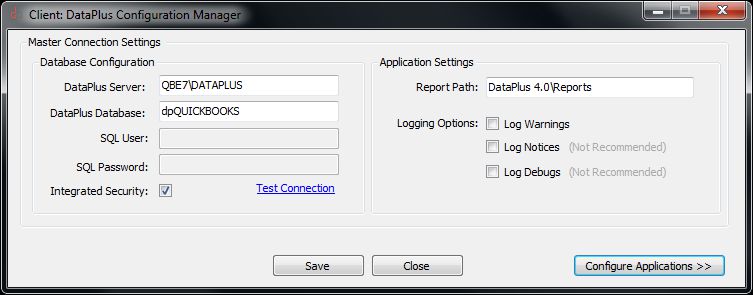
Database Configuration
Database: dpQuickBooks DataPlus database name
Server: ServerName\Instance SQL Instance if applicable
SQL User: sa
SQL Password: password
Check if you want integrated security
Test Connection
Click on OK
Click on Update
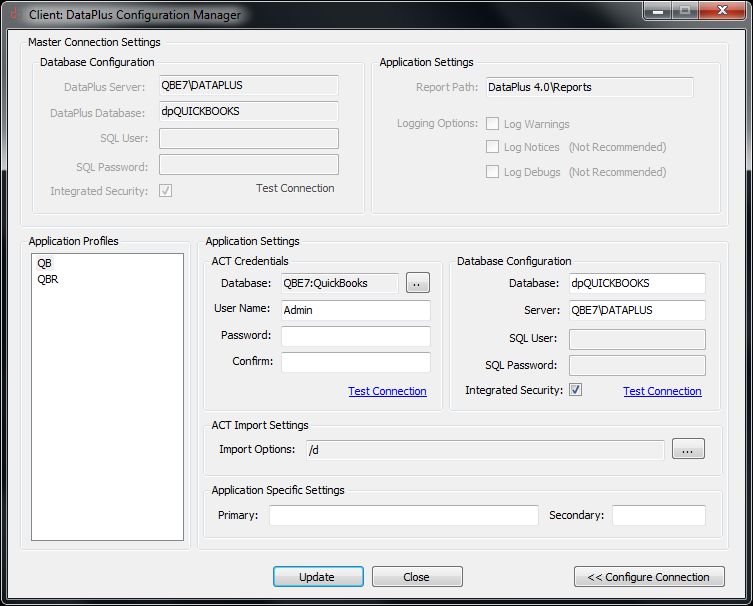
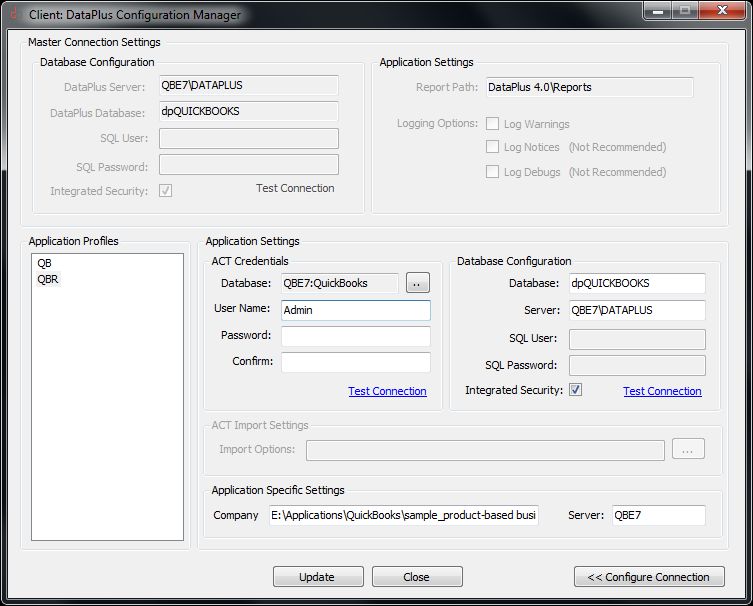
Server Configuration ManagerMaster Connection SettingsApplication Profiles Application Profiles
Click on QBR
Application Settings Act Credentials
Database; ActDatabaseName click on [...] to browse to database
User Name: ActUserName must be an Act! administrator
Password: ActPassword
Confirm: ActPassword
Test Connection
Click on OK
Database Configuration
Database: dpQuickBooks DataPlus database name
Server: ServerName\Instance SQL Instance if applicable
SQL User: sa
SQL Password: password
Check if you want integrated security
Test Connection
Click on OK
Application Specific Settings
Company (QuickBooks Company)
Server (Where QuickBooks is installed)
Click on Update
Click on Close
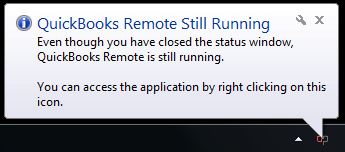
QuickBooks Remote
Start QuickBooks Remote
Open QuickBooks Company with Administrator user
Ensure QuickBooks is in "Single-user Mode"
Click on Start/All Programs/Hogan Data/dpQuickBooks/QuickBooks Remote
QuickBooks Remote Started
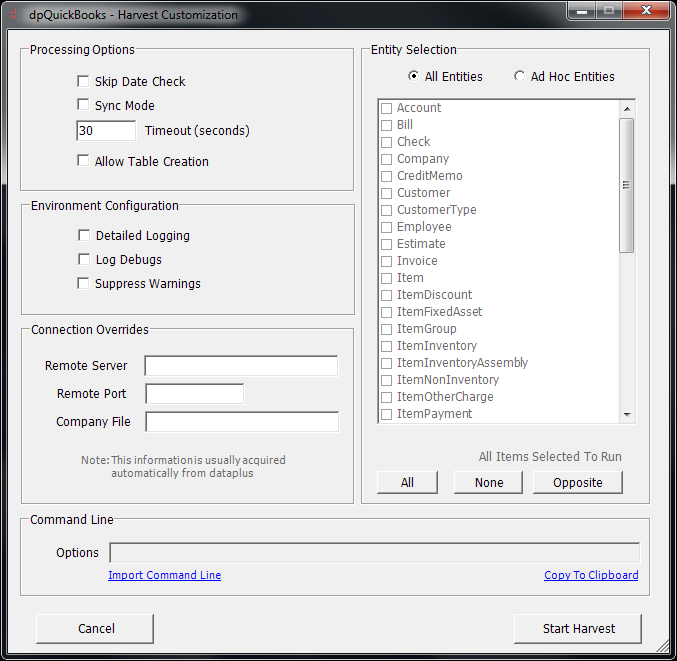
QuickBooks Harvester
Start QuickBooks Harvester
Click on Start/All Programs/Hogan Data/dpQuickBooks/QuickBooks Harvester
Processing Options
unCheck Skip Date Check
unCheck Sync Mode
Enter 30 Timeout (seconds)
unCheck Allow Table Creation
Environment Configuration
unCheck Details Logging
unCheck Lob Debugs
unCheck Suppress Warnings
Connection Overides
Remote Server Leave blank
Remote Port Leave blank
Company File Leave blank
Entity Selection
Choose All Entities
This will sync all QuickBooks entities to your SQL database.
Note: The process could take a lot of time depending on amount of data in QuickBooks. We recommend just running "Ad Hoc Entities" "Customer" only and then later running the full harvest and specific items to harvest as addressed in next step.
Choose Ad Hoc Entities
This will sync only chosen QuickBooks entities to your SQL database
Note: There are specific DataPlus menu items that are dependent on each entity. Therefore information relating with unchecked entities will not display data.
Command Line
Options Leave blank
Note: Command line is an "Advanced" setting that will enable you to Harvest specific entities utlizing BAT files and Microsft Scheduler.
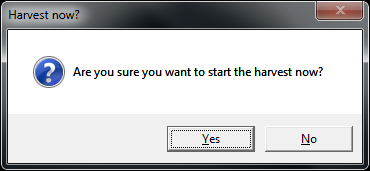
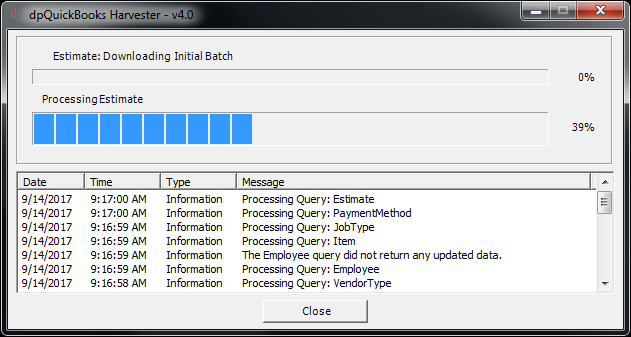
Click on Start Harvest
Are you sure you want to start the harvest now? Yes
Note: More information on configuration of Harvester can be found here
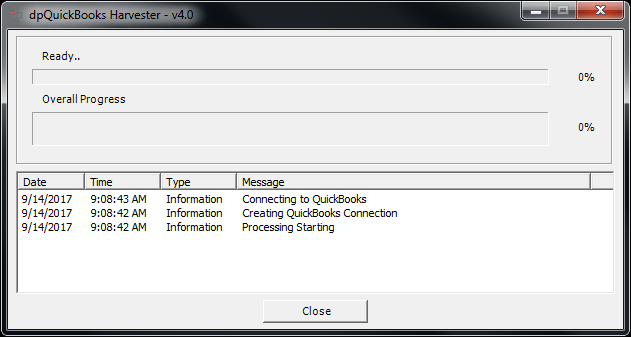
Start QuickBooks HarvesterReady To Harvest
Connecting to QuickBooks
Note: After clicking on Start Harvest, QuickBooks will launch application to allow connection.
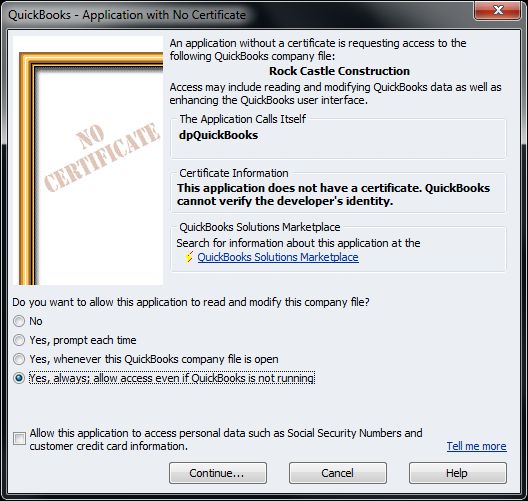
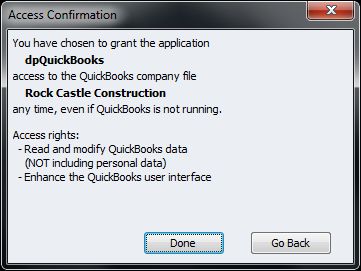
Start QuickBooks HarvesterQB Application With No Certificate
Click on Yes, always; allow even if QuickBooks is not running
Click on Continue...
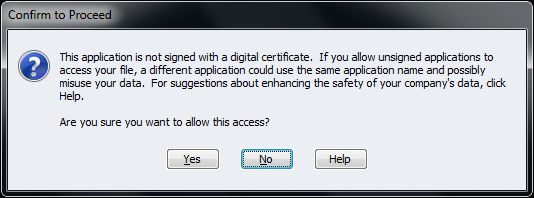
Start QuickBooks HarvesterQB Certificate Confirm to Proceed